Overview of the Settings Tab in Forms
The settings tab in the Forms module allows you to customize areas in a form such as notification emails, access to forms and more. Some of the areas you can modify include:
- Form Submission Options - You can customize the thank you message that appears after a form is submitted or redirect to a landing page or website.
- Publish Form Options - You can generate an embed code to add a form to your website or make modifications for the text and logo that appears on a hosted form page.
- Confirmation Emails - You can send confirmation emails to contacts after they have submitted a form.
- Notification Emails - You can modify the notification emails received for TIEIT users after a form is submitted by a contact.
- Form Sharing and Permissions- You can share forms with other TIEIT users in your team.
- Change Record Owner - You can change the form owner.
Form Submission Options
In this section, you can select a number of options to have your form submitters redirect to another page. You can also modify the thank you message that appears after the form is submitted. Depending on your selection, these will occur after a contact has submitted a form.
When you create a new form, the current form completion confirmation type is a default thank you message.

Adding a Thank You Message and Page Redirect

To create your confirmation type, enter the name of your confirmation, select your confirmation type and enter the details. Click the save button when done.
Adding Additional Confirmations, Selecting the Default Confirmation and Deleting/Editing Existing Confirmations
If you have added more than one confirmation type, you can select the radio button that is to the right of a confirmation to select it as the default.
To add a new confirmation, select the + Add New Confirmation button on the top right.

To edit or delete a confirmation, click the icon with the 3 circles to the right of a confirmation. Click the pencil icon to edit and the trash can icon to delete.

Publish Form Options
In this section, you can create an embed code for a TIEIT form so you can add it to your website. There is also the option to share forms with your contacts through the self-hosted form link.
The self-hosted form link can be obtained in a number of ways:
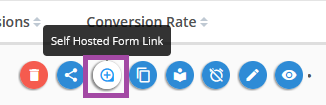
1. In the Form Listing Page - Click the icon with the 3 circles to the right of the form you want to share and click the self-hosted link icon

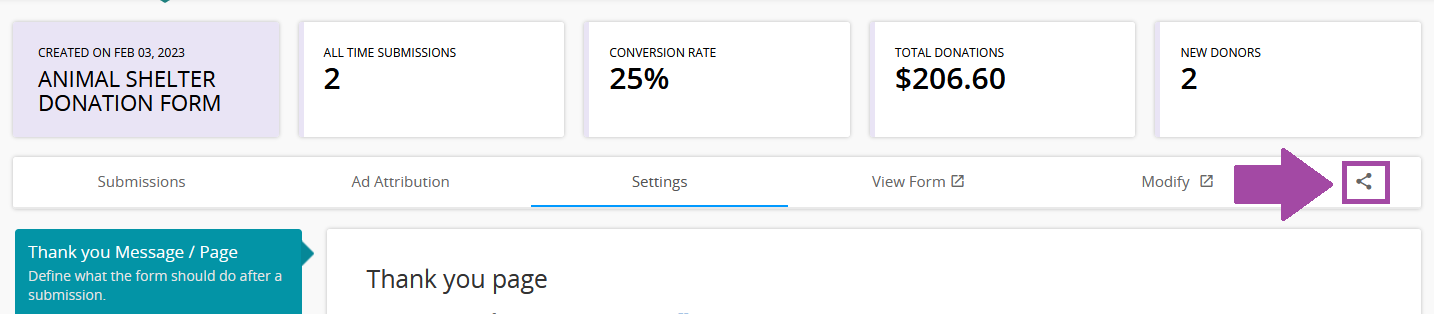
2. In the Form Editing Page - Click the share button on the top right to obtain the link.
3. In the Publish Form Options Page - Click the icon to copy the link.
Self-hosted Form Page
Modify Details in a Self-Hosted Form
On the hosted form link, you can add your company logo, modify the header and description. To add the logo, you can turn the toggle on for the logo area. To modify the header and description, enter the text in the text boxes. Click the save button when done.

Embed Forms on Your Website
How to Create an Embed Code
You can easily create an embed code for your website so you can capture a contact’s information to your TIEIT account. There are two ways you can embed the form:
- JS Embed Code - When this option is chosen, any changes made on TIEIT will automatically update the form on your website.
- iFrame Embed Code - This option allows more flexibility with styling if your website cannot use a JS embed code. If this option is added to your website, you will need to update the embed code if you make any changes to your TIEIT form as this will not automatically reflect on your website.
To learn how to create an embed code for your website, please see the instructions below.
Please note that if you are adding multiple TIEIT forms to the same page on your website, only one JS embed code can be used. If you need to add another form to the same page, please use the iframe embed code for your second form.
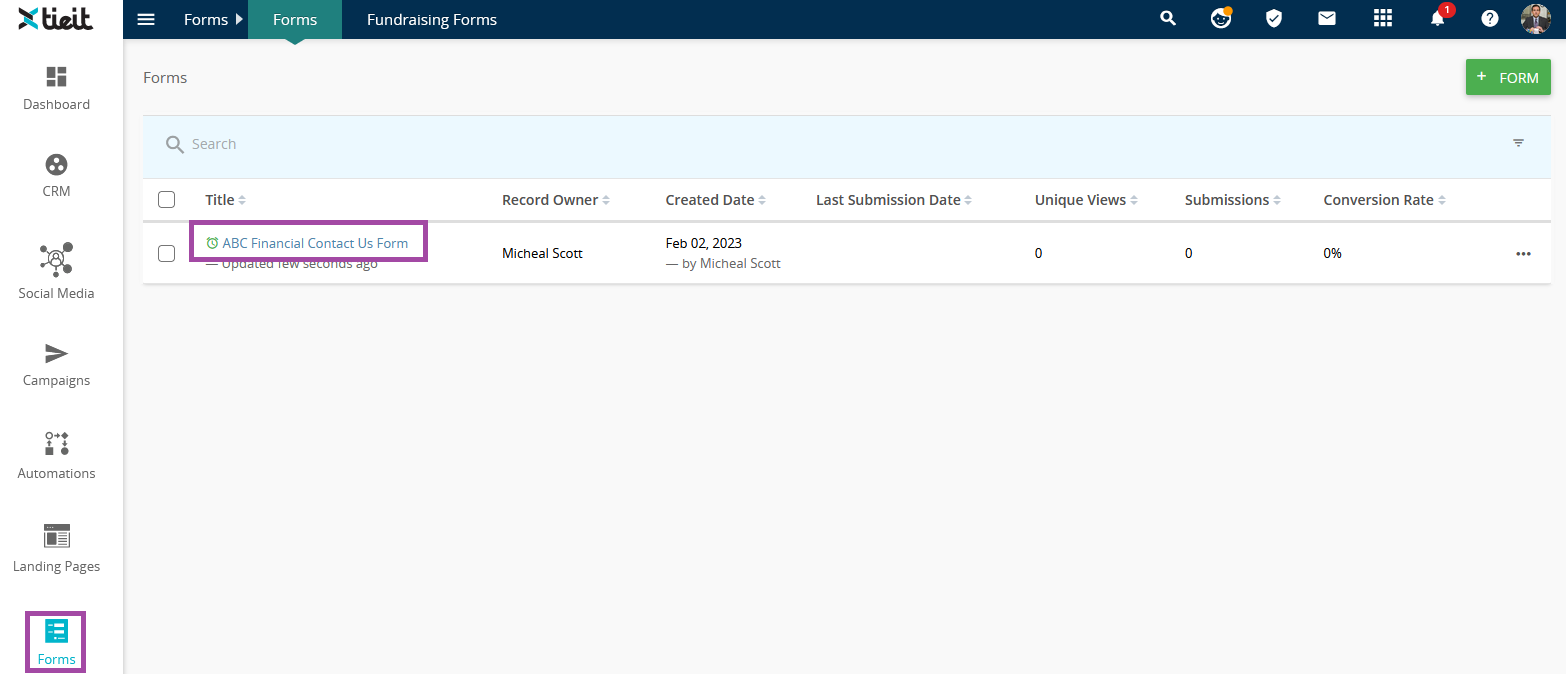
1. Click the Forms module icon on the left menu. Click the name of the form you want to create an embed code for.
2. Click the Settings tab. Click Publish Forms Options on the left panel.

3. Scroll down to the bottom. Select the create new button.
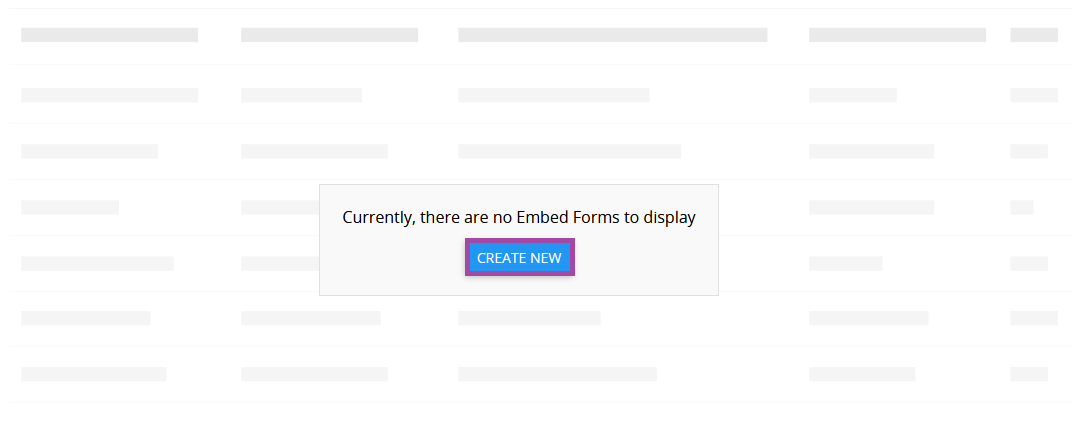
If you already have existing embed codes created, you can click the + Embed Code button on the top right of this section.

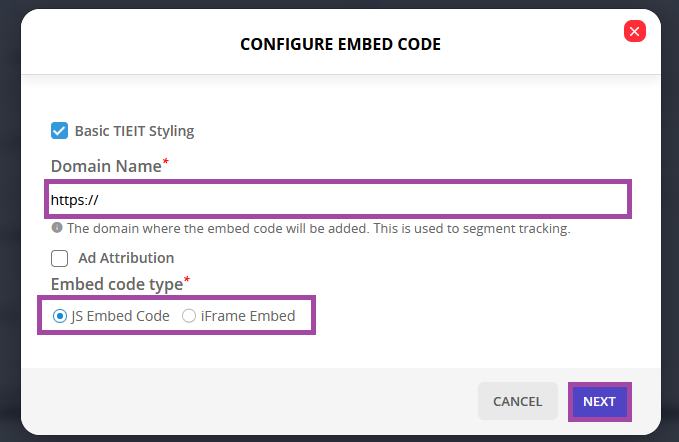
4. Enter the URL of the website you want to embed your TIEIT form to. Select which type of form embed code you want to generate. Click the next button when done.
5. A window will then appear where you can copy the code.

If you need to delete, edit or copy the code again, you can click the icon with the 3 circles to the right of the embedded code created. Three icons will then appear so you can select an option.

Confirmation & Notification Emails
When creating forms, you can customize the information that appears for confirmation and notification emails.
- Confirmation Emails - These are emails that are sent to individuals after a form has been submitted.
- Notification Emails - These are emails that are sent internally (to TIEIT users in your team) to notify them after a form has been submitted. By default, the creator of the form receives notifications, but other users can be added through a form's settings.
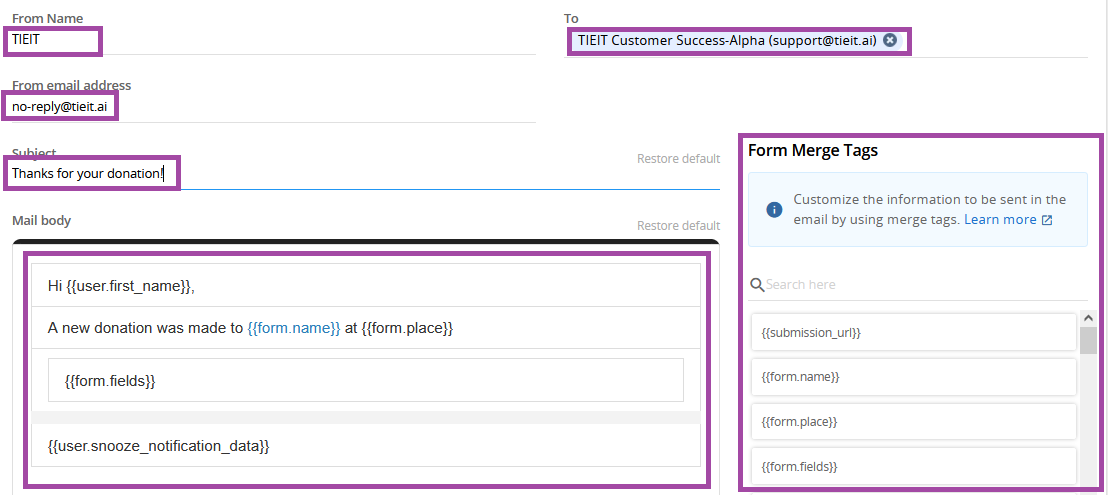
Customizing the email
In both notification and confirmation emails, you can customize the following:
- From Name
- From Email Address
- Subject Line
- The emails that appear in the Reply-to line (Confirmation Email) and the To line (Notification emails)
- The Body (Main Text) of the Email
- Add Merge Tags
What are merge tags?
Merge tags are tags that you include in an email that populate data from your TIEIT account. For example, if you add the {{first_name}} merge tag to a form submission confirmation email, this would add the first name of the individual who completed the form. Here are some common merge tags used:
- {{first_name}} - This enters the first name on TIEIT for the contact.
- {{last_name}} -This enters the last name on TIEIT for the contact.
- {{company.company_name}} - This enters the company name on TIEIT for the contact.
- {{form.name}} - This enters the form name of the form that the contact submitted
- {{form.fields}} - This enters the form fields and the data that was submitted by the contact
- {{user.meeting_link}} - This enters the TIEIT form (record) owner’s meeting link that is entered in their account
- {{user.signature}} - This enters the TIEIT form (record) owner’s email signature that is entered in their account
To enter a merge tag in your confirmation or notification email, select the location you would like to place the merge tag in the body of the email and then click the merge tag you want to add from the merge tag panel on the right. The merge tag will populate in that area. You can also search for merge tags using the search bar.

Confirmation Emails
Confirmation emails are emails sent to a contact after they have submitted the form. When confirmation emails are active, a default form confirmation message sends to the contact with the details they have entered in the form fields. When forms are created, this is turned off by default.
To turn this on, toggle on the confirmation emails. If you wish, you can make modifications to the email. Click the save button when done.

If you would like to send a non-text-based confirmation message, click the link to the Knowledge Base article below.
Notification Emails
Notification emails are emails that are sent to TIEIT users. When a form is created, the form creator is typically added to the reply-to email address. There is also a default message that is created. You can modify the email address areas as well as any text related to the email. Click the save button when done.

Form Sharing and Permissions
When forms are created, only the form creator will have access to view and edit the forms. If you would like other team members on TIEIT to view the form, you can make these changes through the sharing option. To learn how you can modify this, please read the instructions below.
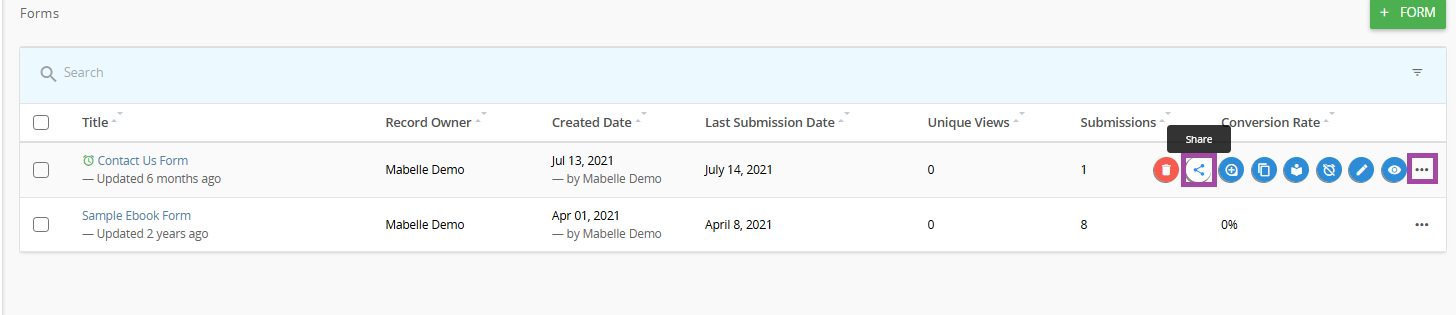
1. Click the icon with the 3 circles to the right on the form you would like to share. Once clicked, other icons will appear. Click the share icon.
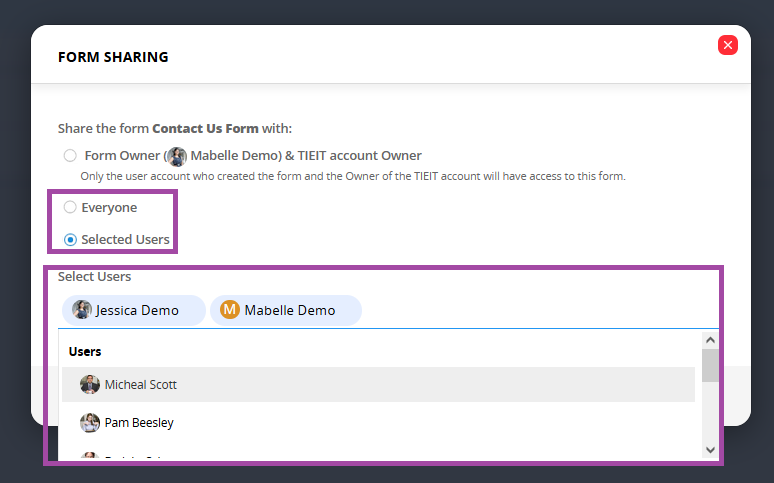
2. Select Everyone to share with your entire team on TIEIT or Selected users. Click the save button when done.
Change Record Owner
To change the form owner, please follow the steps below.
Please note that when a form is created, the default sharing option is for the form owner and the administrator of an organization’s TIEIT account. If you are changing the form owner, but still need to access the form, please make sure to change the sharing option to include yourself before changing the form. If you do not, you will no longer have access to see the form after changing the record owner.
This can be done by clicking the icon with the 3 buttons to the right of the form you want to edit.

You can then select to share it with everyone or selected users. If you choose selected users, please make sure to add yourself. Click the save button when done.

How to Change the Record (Form) Owner
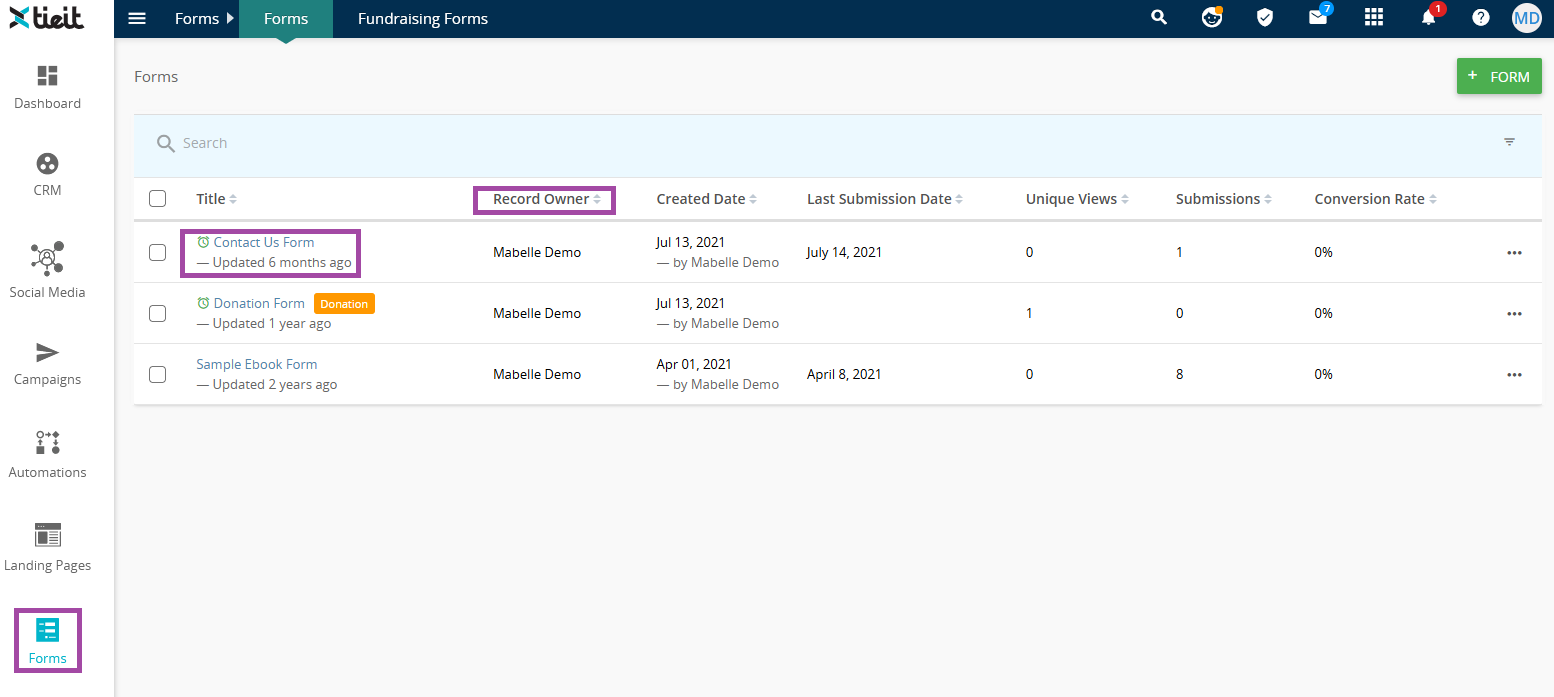
1. Click the forms module and click the name of the form that you would like to change the record owner for.
2. Click the Settings tab. Click the Record Owner tab on the left menu.
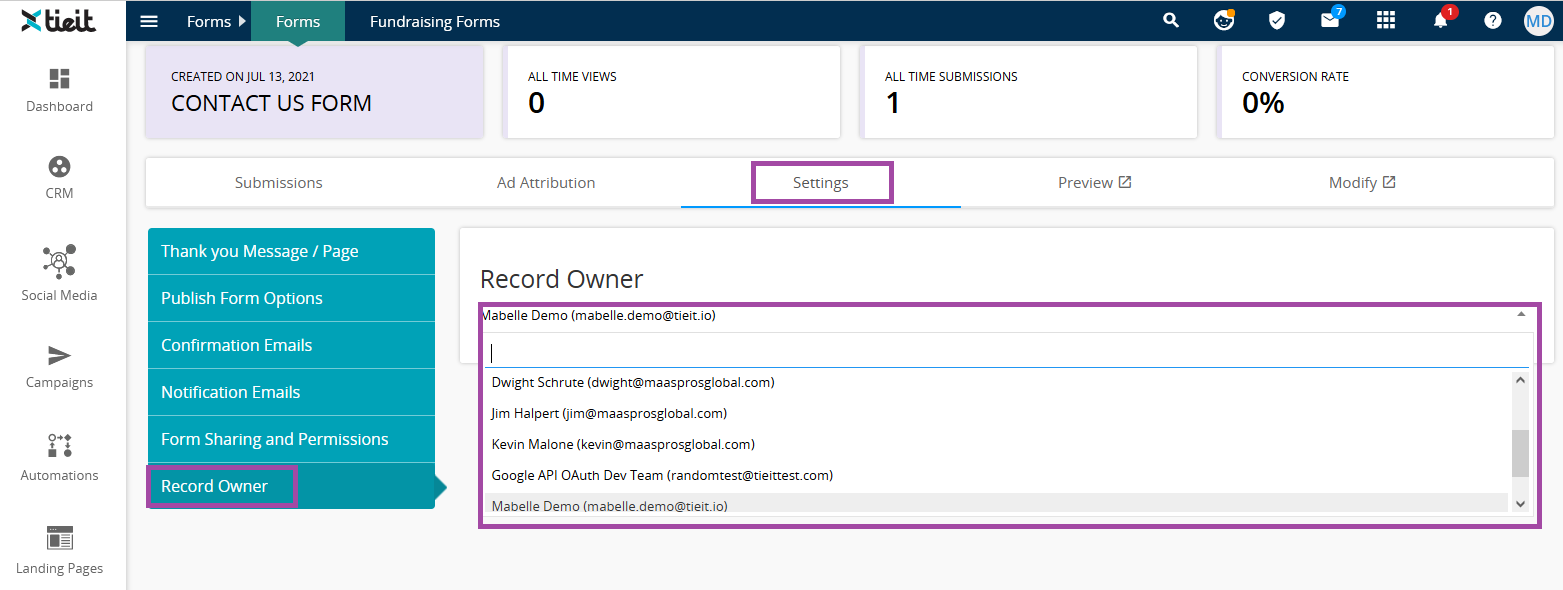
3. Once you select a new record owner, a pop-up on the left will appear to let you know that the record owner has been updated.
