How do I create a form?
TIEIT Forms is an advanced online form builder that provides robust features while remaining user-friendly. TIEIT forms can help you collect leads from your website, respond to surveys, manage registrations, intake forms, collect job applications, collect donations and even do advanced things such as manage pet registrations. That's right. You read that correctly. A few cities use TIEIT forms with the TIEIT API to manage their pet registrations and automated renewals.
TIEIT forms can do a lot for your organization. It streamlines data collection and using TIEIT automations, you can automate actions based on responses.
And the beauty of TIEIT starts to shine even more because it is baked right into all the other modules that help run your organization. You will not have to import and export data between applications. You can have all your data under one powerful roof while bringing efficiency to a new level. Explore how to create forms by reading the sections below.
Creating a Form
Building a form in TIEIT requires you not to know any coding or need to hire a developer. You just have these three main steps:
- Build the form - Use the easy-to-use drag-and-drop builder to build the form you need. Apply conditional logic and more.
- Style the form - Customize your forms using the form theme builder or apply advanced styling using custom CSS.
- Publish and share the form - Whether you want to share your form by sending your prospects and clients a direct secure link or want to embed it on your website, you have the flexibility that will work best for you.
Building a Form
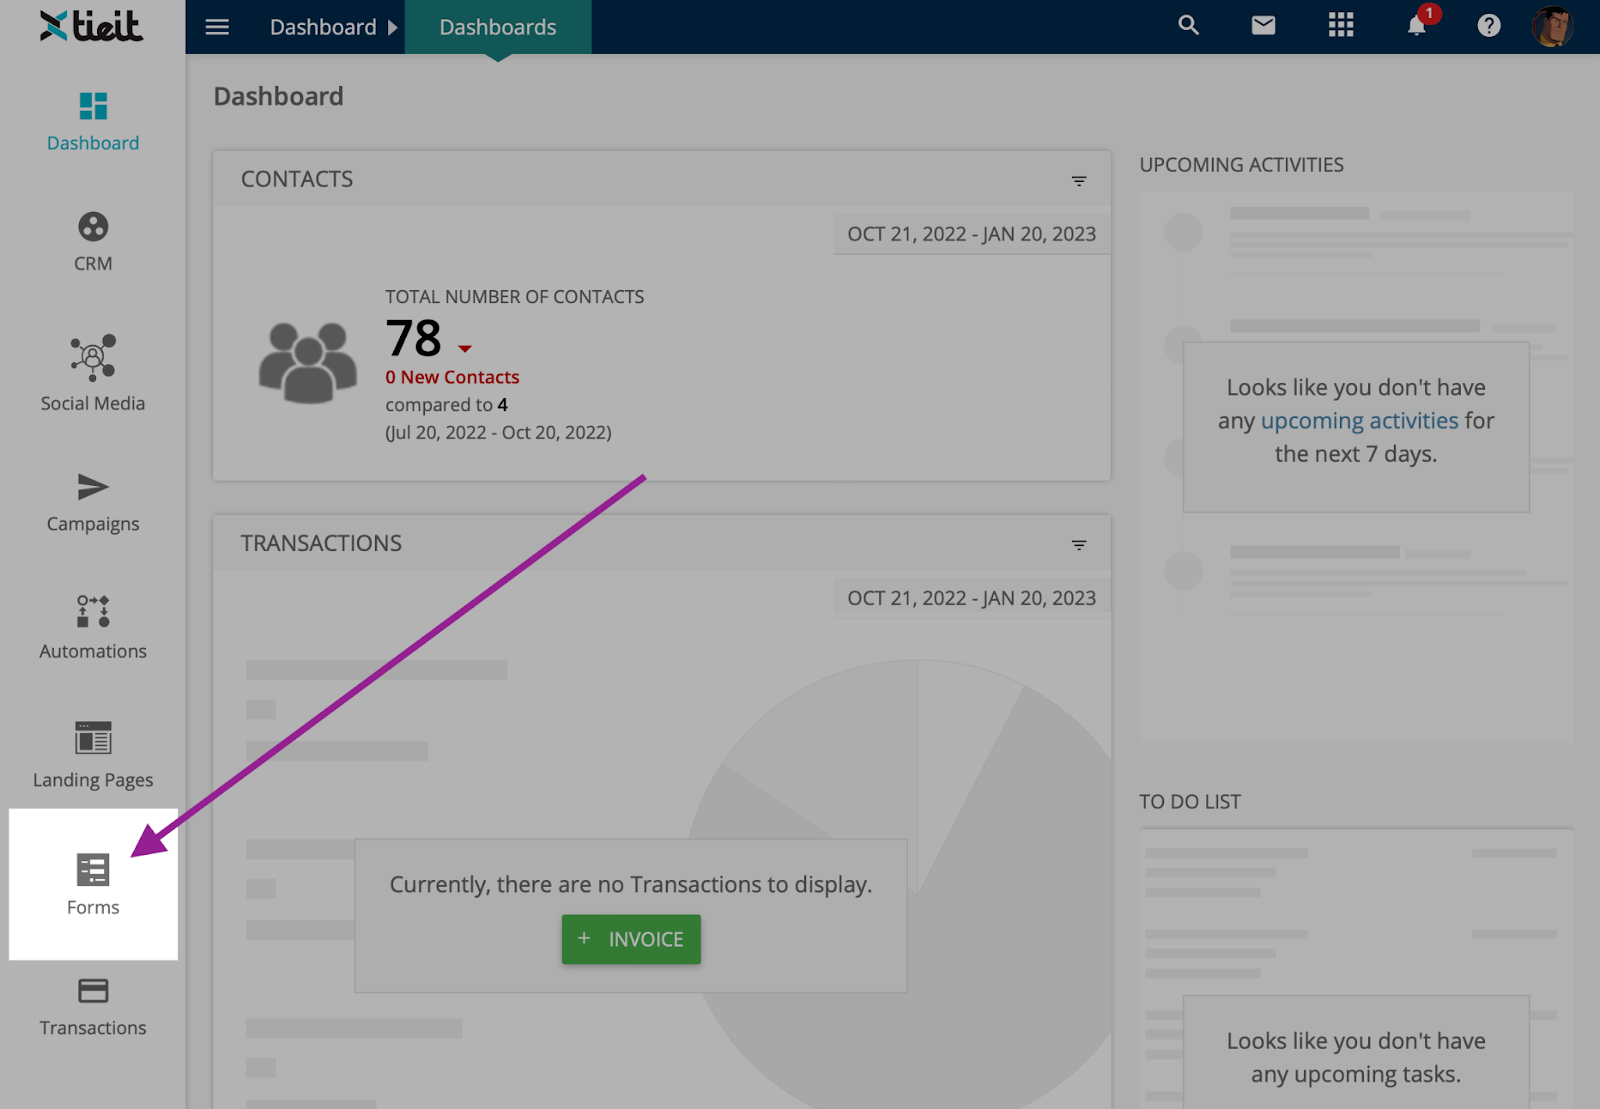
1. Log into your TIEIT account. Click on FORMS from the side menu
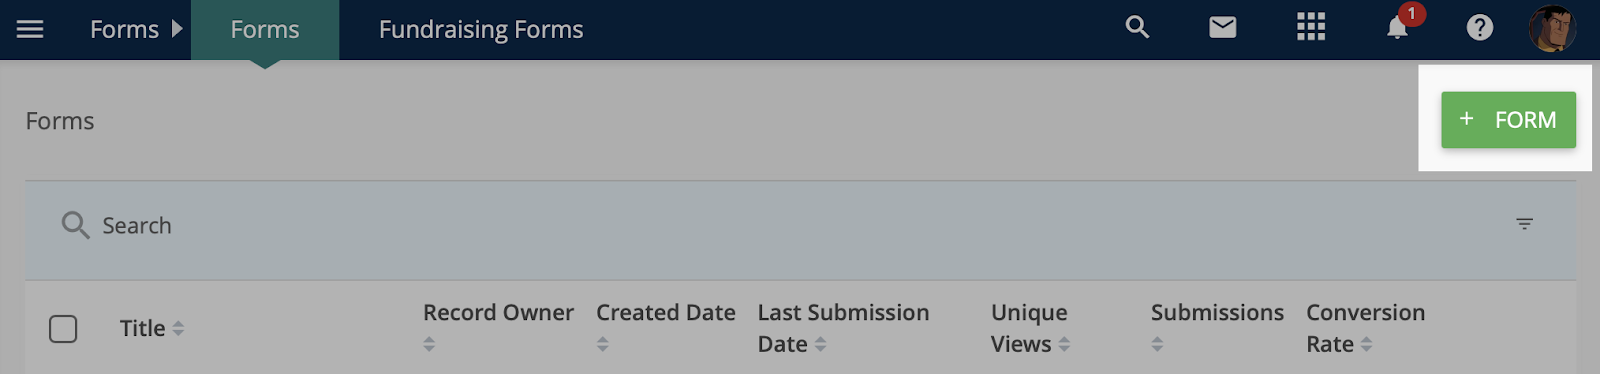
2. Click on the + FORM button
3. Select the type of form you want to create. Here is a quick summary of the different types of forms. In this article, we will go over how to create Standard forms.
- STANDARD forms are the most common. They can be used to create from basic contact forms to advanced logic-driven intake forms. Keep reading this article to learn how to create a form that meets your needs.
- SURVEY forms offer pre-built survey types. What differentiates Survey forms from other types of forms in TIEIT is that the email address is not a required field. Click here to learn how to create a survey.
- DONATION forms allow you to collect donations. What makes these forms unique from the other two is that it provides some unique functionality to effectively collect donations, show a progress bar, generate official donation receipts and more. Click here to learn how to create a donation form.

How to Create a Standard Form
1. Name your Form. This field allows you to name the form. It is a required field and it needs to be unique.
2. The source field will automatically populate the name of the form. You can change it. You can select from existing sources or create a new one. This field allows you to classify where the contact who fills out the form came from. The source field is also tied to automations that can be triggered based on the Source.
3. Select the STANDARD form option.
4. Click the save button to continue.

5. Once you create the form, you will be taken to the form builder page. This is the same page you will go to when editing a form. Over the next few steps, we will outline the main features available on this page.
NOTES:
- The Email address field is required when creating a Standard or Donation form.
- When creating a form, all changes are saved automatically.
Elements in a Form
 |
|
1. This is the Form name. Clicking on the Form name will allow you to change the name. |
|
2. This field will indicates the Source that was defined when creating the form. You can change the source name here by selecting from an source name or create a new one. |
|
3. The left pane lists all the standard and custom fields. The fields are categorized the module. You can also use the search bar to search for a field name. More below. |
|
4. The form editor pane. Drag fields onto the editor and you can click into the field to customize it further. |
|
5. The bottom pane has options to preview any logic that were added, preview the form, apply themes, copy the hosted form link and go into settings. We will explore this further or click here to read about this section now. |
The Field Pane
The field pane includes all the fields available to add to your form.
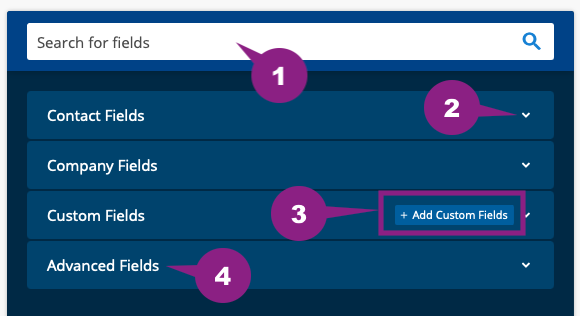
1. The field panel has a search bar that allows you to search for standard and custom fields.
2. Clicking on the arrow within these sections will expand the tab to show or hide the fields available to select from.
3. You can quickly create a custom field as long as your user profile has the correct permissions. If you do not see the Add Custom Field option, reach out to the administrator of your TIEIT account or contact us and we will be happy to point you in the right direction.
4. Advanced fields are standard form-related fields available for all types of forms.
- Google reCAPTCHA - This is a widget to help reduce spam
- Text Content - This is a widget to add text onto your form (e.g. disclosure statements, introductions, instructions etc.)
- Address - This field allows you to customize the fields related to collecting the address. The Address field maps back to the Contact’s primary address field.
Adding and Managing Fields
You can add a field over to the right pane by dragging the field from the left field pane. Once the field is on the editor pane, you can reposition the field by dragging and dropping the field.
After adding a field to the editor pane, you can now move fields, modify the field layout and field properties.
Moving fields
Please note that if you have any conditional logic applied, the conditional logic will reset if a field is moved.
You can move a field byclicking on the field and repositioning it.
You can also move a field by hovering over the field, clicking on the move icon and selecting from the dropdown where you would like the field moved. This is useful if you have a long form or a form with multiple pages.
Field Layout
You can customize the layout of fields by editing a section and specifying the number of columns within that section. Fields will automatically readjust.
Field layouts are managed at a section level. This allows more flexibility as you create you form by having different layouts based on the need of that section.
Alternatively, you can apply CSS to control the position of fields.
Additional Field Properties
You can access additional field properties by hovering over a field and clicking on the edit icon.

Basics of a field
Once you have the edit field editor open, you can change the label, add placeholder text and make a field required. The image below shows the difference between a label and the placeholder text on a form field.
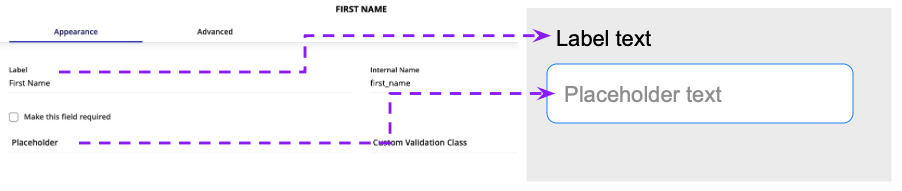
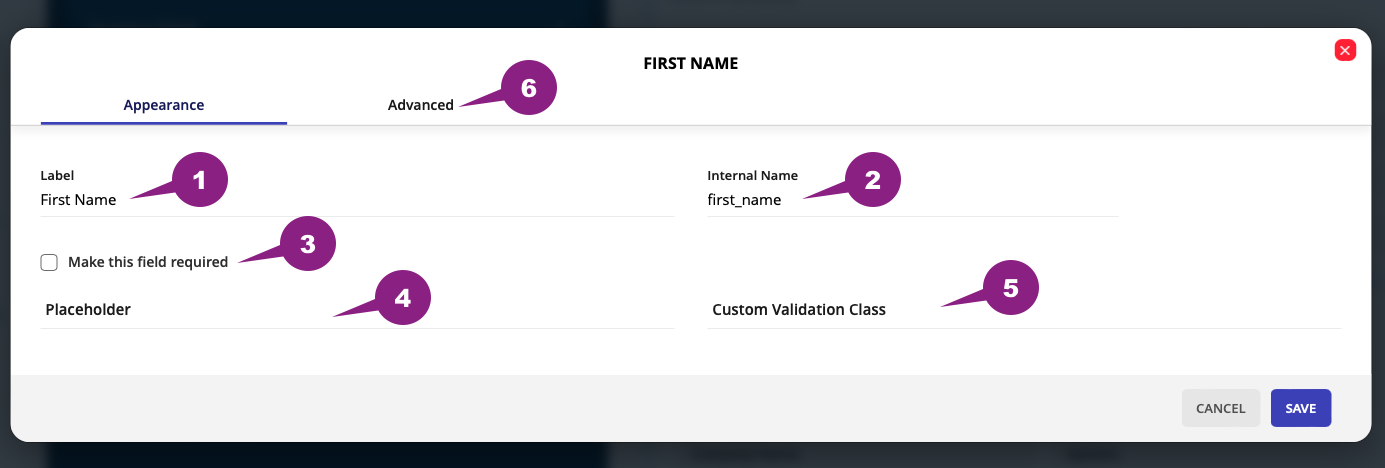
1. The field label is the name of the field that your visitor will see.

Tip: When creating a custom field, we suggest not adding punctuation such as : to the custom field name. Colons can be added at this stop when defining the field label.
2. TIEIT forms allow you to pre-populate a form or to pass values form a form submission utlizling query parameters. The internal field is utilized for that purpose. It is the variable name of a query parameter and must be unique. More of how to utilize this feature is covered here.
3. Toggle this on to make the field required.
Tip: When creating custom fields, we suggest not to make the field required. For example, a custom field can belong to a contact, company and/or deal record. If a custom field is made to be required, then when editing one of those records, it will not allow that record to be saved unless this field is filled. So in most cases, you and your team may not need to populate this value at a record level but may want to make it required at a form level. So you can make a field required by toggling this option on when editing a field.
4. By default, it will input the label name. You can remove the placeholder text or you can add a custom value. Placeholder texts are used to provide a user additional information (e.g. format you are expecting the data, additional context, etc).

5. When CSS is added to a form, this area allows you to apply certain styling and details related to CSS.
Sections
Sections give you a way to visually group fields on your form. Sections are useful when you have long forms and you want to segment certain sections of the forms.
You can add a heading and text to your section, change the background colour and even apply conditional logic to it.
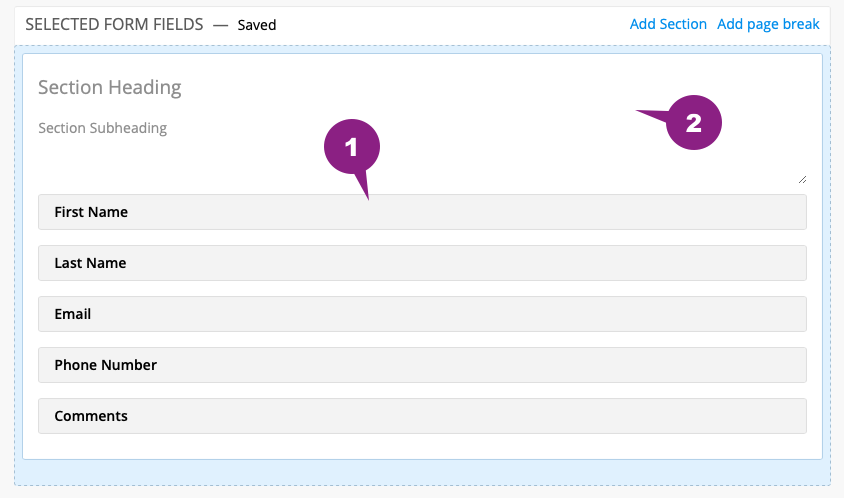
In the form builder, you can quickly distinguish between a section and a field:
1. A field has a grey background
2. The section has a white background
Adding a Section
To add a section, click on the Add Section option on the right pane.
https://media.tieit.ai/watch/c0VrbfVw8BY
To add a section title, other text, a background colour, hover the section and click on the pencil icon to edit an existing section.
Note: Before you can start modifying the attributes of a section, you will need to add a field to that section.
Deleting an Existing Section
Hover over the section and click on the trash icon to delete the section.

Repositioning a Section
After adding a section, you can drag-and-drop the placement of the section - this can also be done after adding fields into a section.
